Stacked Printing with openGrid: Set It and Forget It
What if you could print a day’s worth of openGrid panels without babysitting your printer? That’s the question that kicked off this experiment (and the answer is yes, you absolutely can).
What is openGrid?
openGrid is a general-purpose wall and desk mounting framework and ecosystem. It’s designed with a clear, opinionated structure that emphasizes ease of use, visual simplicity, and modular extensibility.
Built around a 28mm grid size, openGrid is Gridfinity-compatible and integrates with systems like Multiboard, HSW, GOEWS, and standard metric screws. It also has first-class support for Underware 2.0. If you’re into organized workspaces, it’s a fantastic system.
The only catch? You need a lot of grid panels to cover any meaningful area. And that means a lot of print time.
The Problem: Print Bed Real Estate
A typical print bed can only fit so many openGrid panels at once. If you need dozens of them, you’re looking at multiple print jobs—which means either hovering near your printer to swap plates after one finishes.
I wanted to set up a print, walk away for a day (or two), and come back to a stack of grid panels.
The Experiment: Vertical Stacking
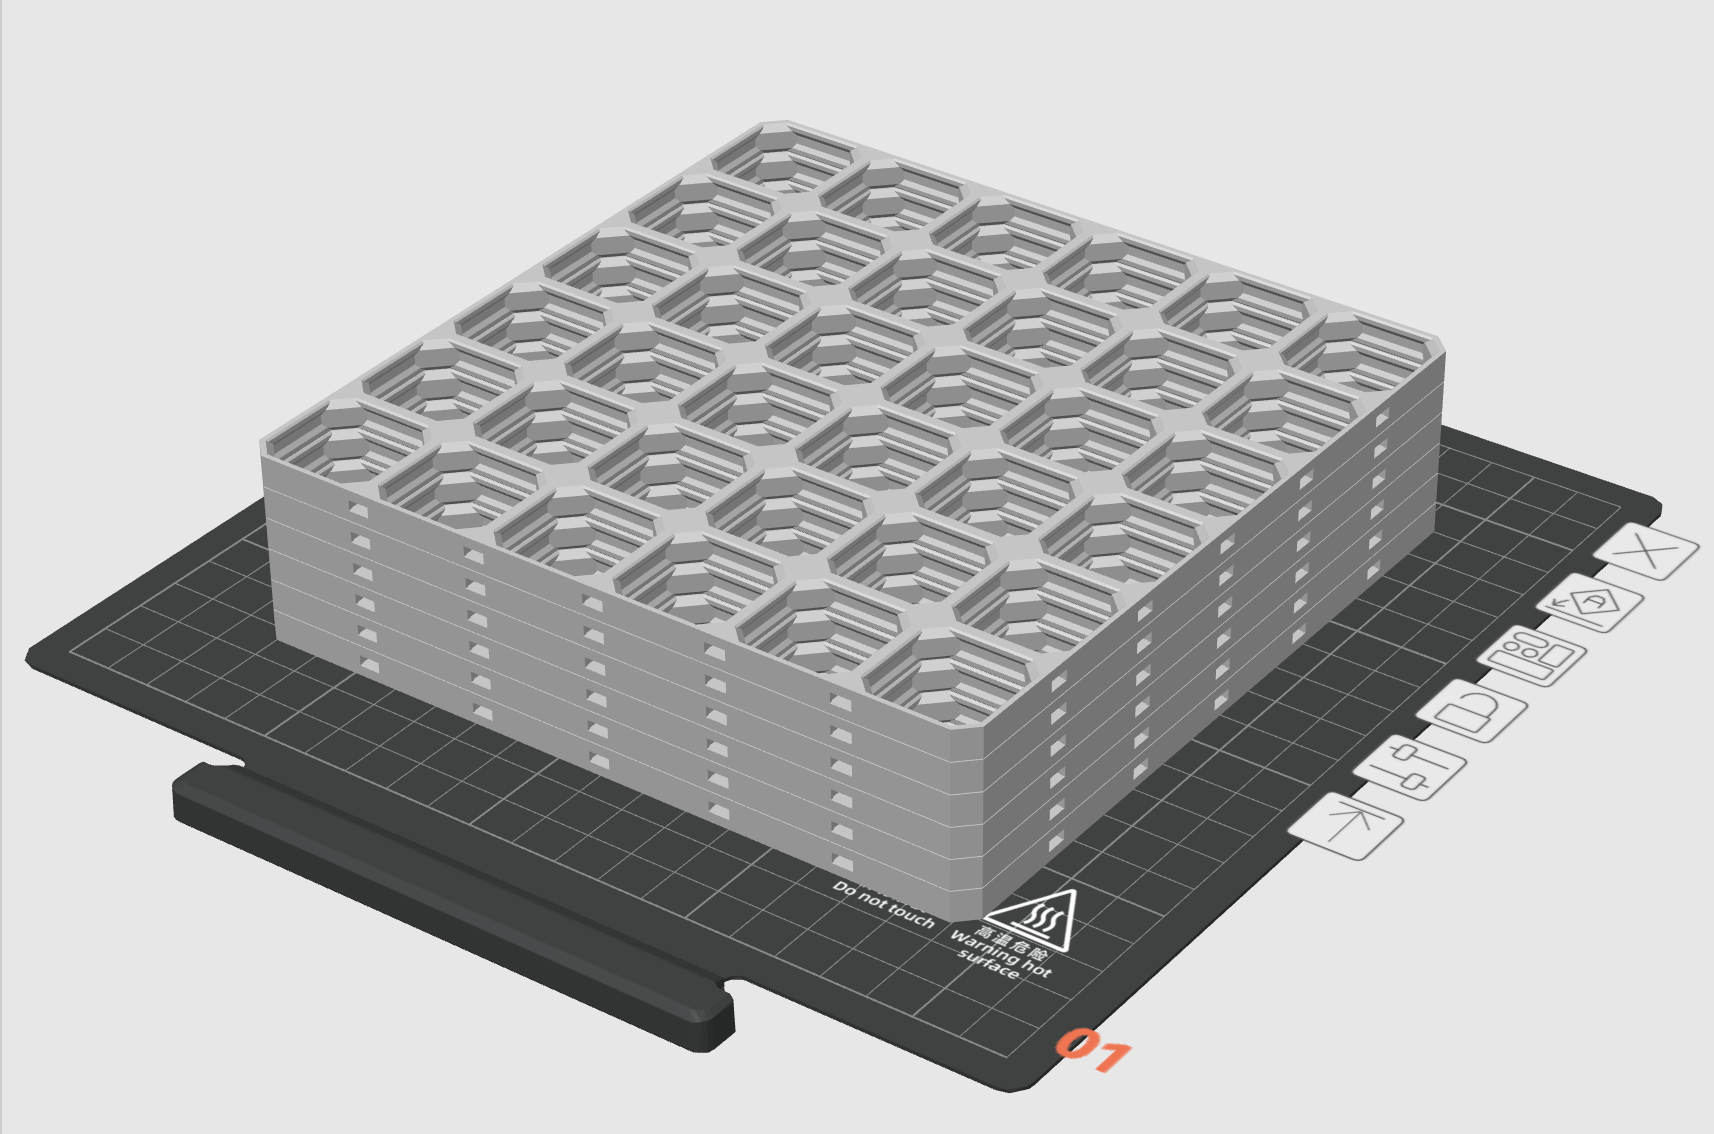
The idea was simple: stack them vertically. Print one layer of grids, then print another layer directly on top, and repeat.
Six openGrid panels printed in a single stacked job—no plate swapping needed.
The key question was whether the layers would separate cleanly after printing, or fuse into one unusable block.
The Secret: 0.2mm Gap + Ironing
After some trial and error, here’s what works:
A 0.2mm gap between layers. This tiny separation is enough to prevent the layers from bonding permanently, but small enough that the print remains stable during the job.
Ironing on all top surfaces. Ironing smooths out the top of each panel, creating a clean, flat surface that the next layer can sit on without adhering too much. Without ironing, the layers tend to grab onto each other and become too difficult (or impossible) to separate.
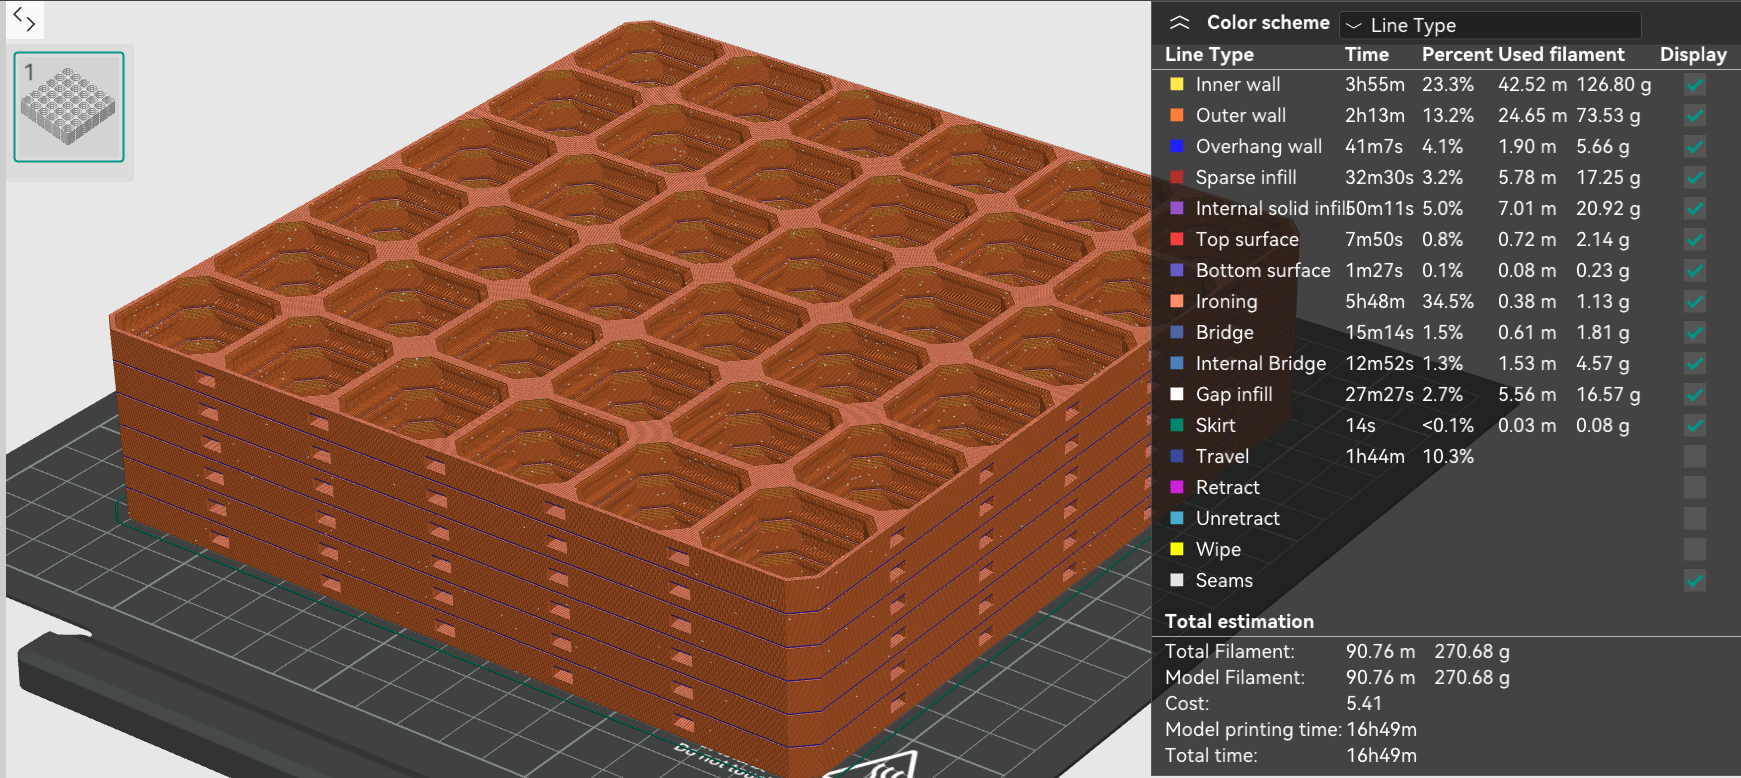 A sliced view showing the 0.2mm gaps between each stacked panel.
The Results
It works. Six panels, one print job, zero intervention required. After the print finished, the panels separated with some effort. It is possible to pry them apart with hands, but eventually started to use a metal paint scraper as a wedge and that was much easier.
Testing stacked print of #openGrid
— DecentPrints.com (@decentprints) January 12, 2026
It is possible, but still more settings to tweak for optimal quality. Thanks to @ddanier for designing the openGrid system!#3DPrinting #DIY #maker #organized pic.twitter.com/ZkA7rIJHxA
This approach lets you maximize your printer’s uptime. Set up a tall stack before bed or before leaving for work, and come back to a pile of panels that you can process in bulk.
Tips for Your Own Stacked Prints
- Start small. Try a 2-3 panel stack first to dial in your settings before committing to a marathon print.
- Check your Z height. Make sure your printer can handle the total stack height.
- Use ironing. Seriously, this is non-negotiable. It’s what makes separation possible.
- 0.2mm gap. Too small and they’ll fuse; too large and your bed will turn into a spaghetti bowl of wasted filament.
If you’re building out an openGrid setup and dreading the print queue, give stacked printing a shot. Your future self will thank you.